#4 Switch to view by URL
Switch to view by URL
To make the views accessible through URL first follow the standard creation process...
- Create a new view using FAB on the views panel.
- In the view configuration enter a view name.
- Create and or select a template file.
For this tutorial we have set up two example views, see: View 1, View 2.
As seen in the example above we've made two views with the routes view1/.* and view2/.*.
To generate the URL we'll use Link.To(parameters: ...) which will build the url from the specified parameters.
⬇️ Result | Source ➡️
Make URL pointing to view
Link to view1 https://blazor-cms.org/oqtane-tutorials?tut=basics-viewswitch&variant=strong&view1=whatever
Link to view2 https://blazor-cms.org/oqtane-tutorials?tut=basics-viewswitch&variant=strong&view2=nice
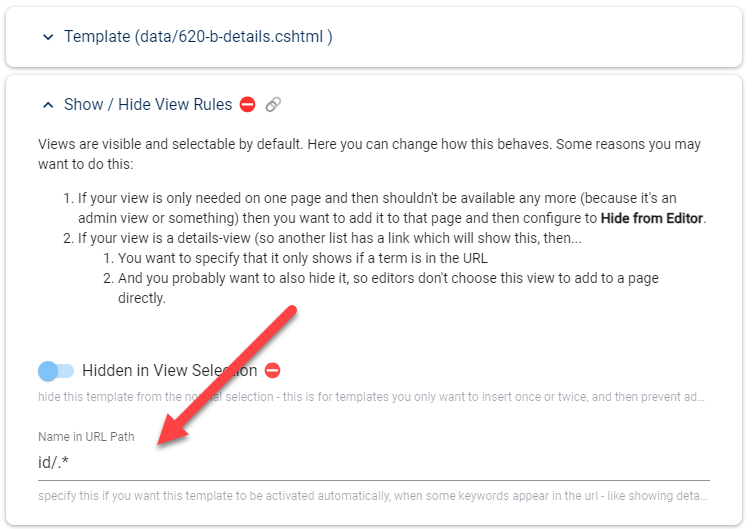
View-Switching based on URL Parameters
This requires the view configuration to be set to activate the details view if id is specified in the url, using id/.*
#4 Switch to view by URL